In Students you can add, edit, or delete students. The grid view will display each Student Code, Student Full Name, Nickname, and Current Status.
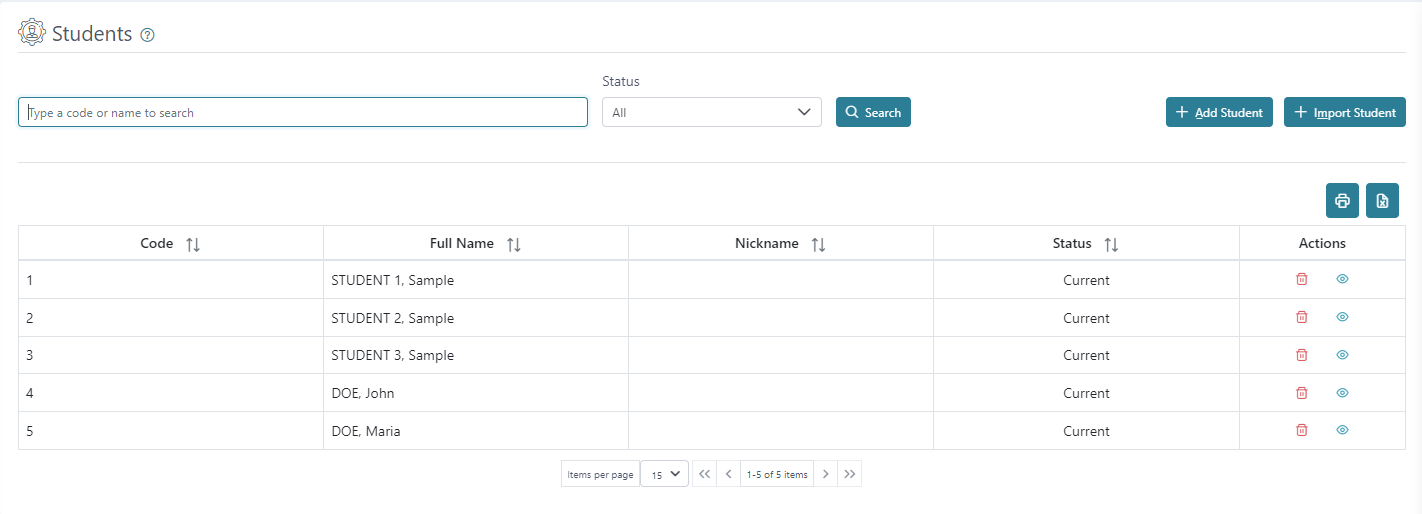
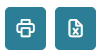
You can print or download a list of students using the printer or Excel icons on the right, above the grid view.
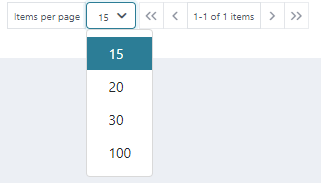
The grid view will display the first 15 students by default, and any additional students will be displayed in separate pages. There is a count for how many students are available and how many are being displayed on the page out of those available. The arrows can be used to move between pages.
You can search for Students using their Code, or Name.

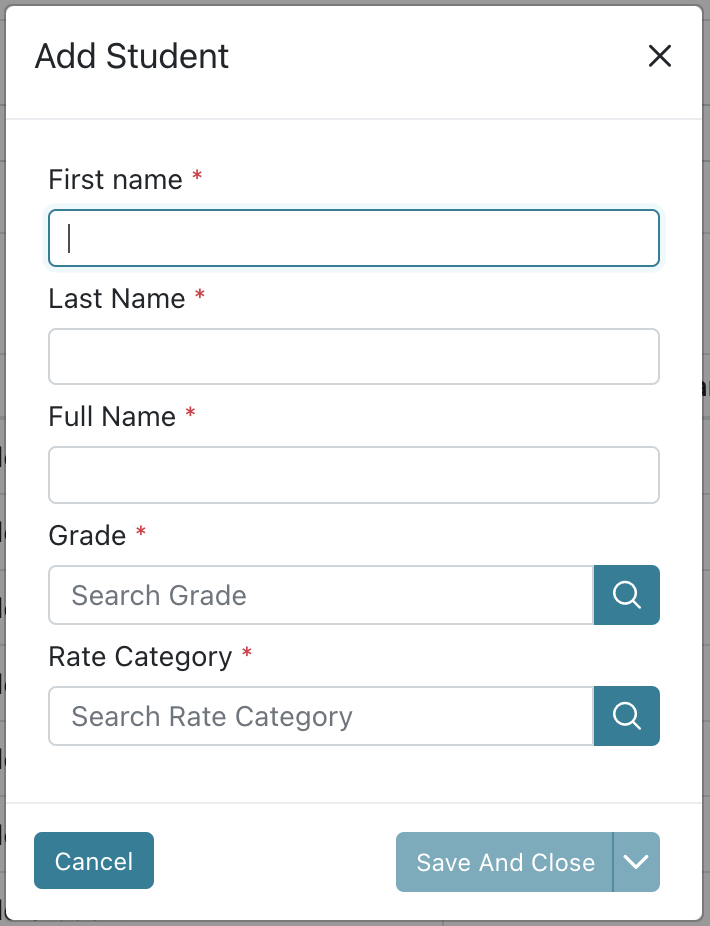
To add a student, click on the Add Student icon on the top right. Here you can add the Student’s Name, Grade, and Rate Category. Click Save and Close to save the student and go back to the Student screen.
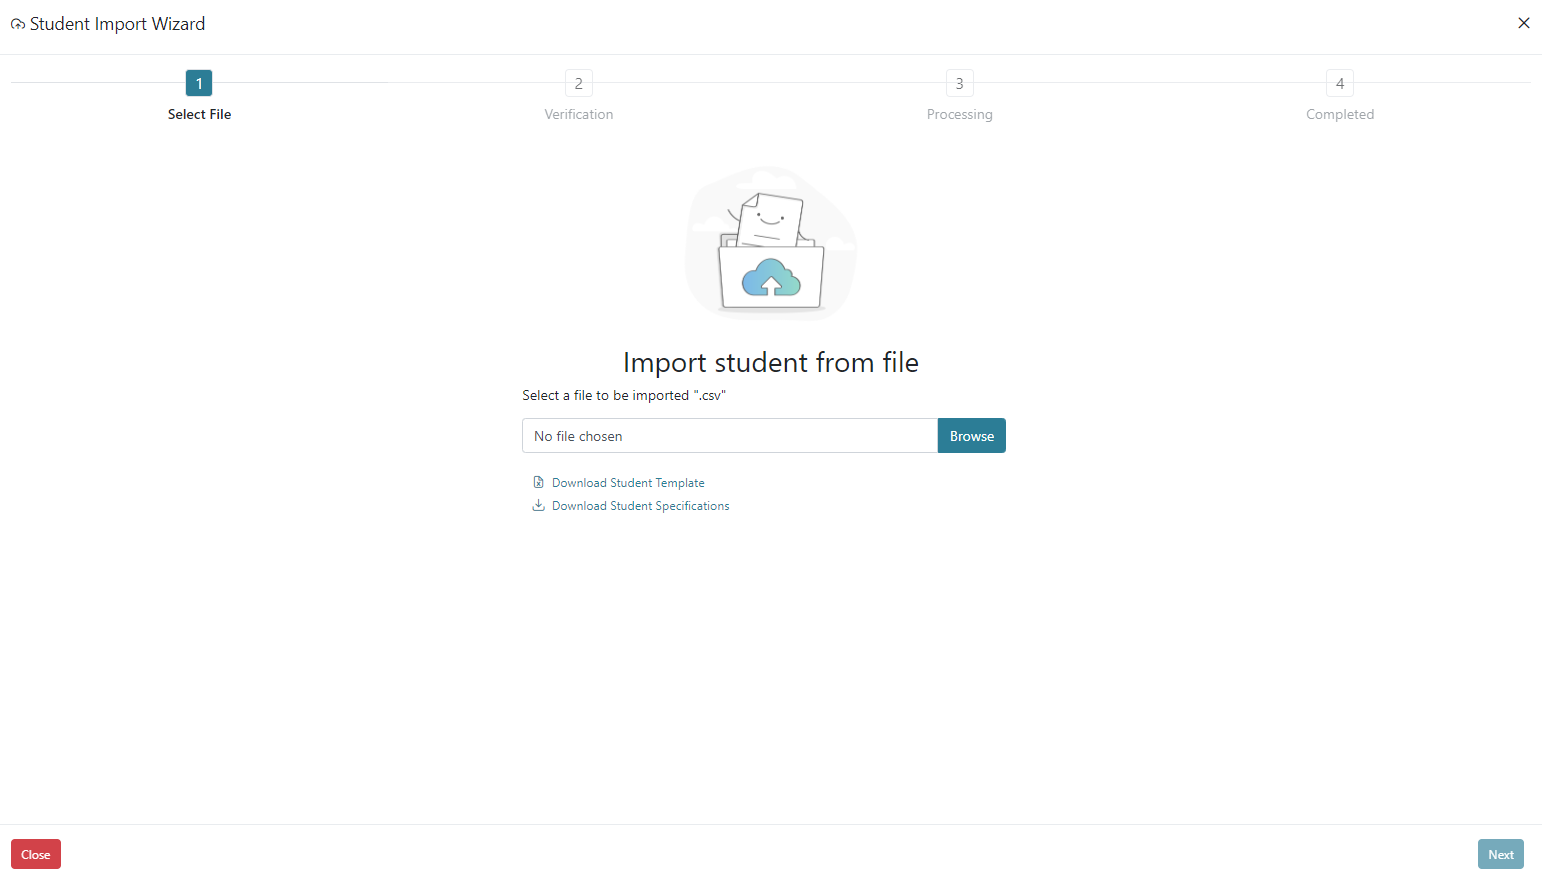
Import Students – This is where you would import students from a CSV file. This would be useful if you have a list of all the students and want to import all at once. This process has four steps:
- Select File – On this step you can browse your computer for the CSV file to be imported. There are two blue hyperlinks where you can download a template CSV file with the correct headings prepared for import and specifications for formatting of an import file. Next will advance you to the next step of the import process and Cancel will cancel the process without saving any progress.

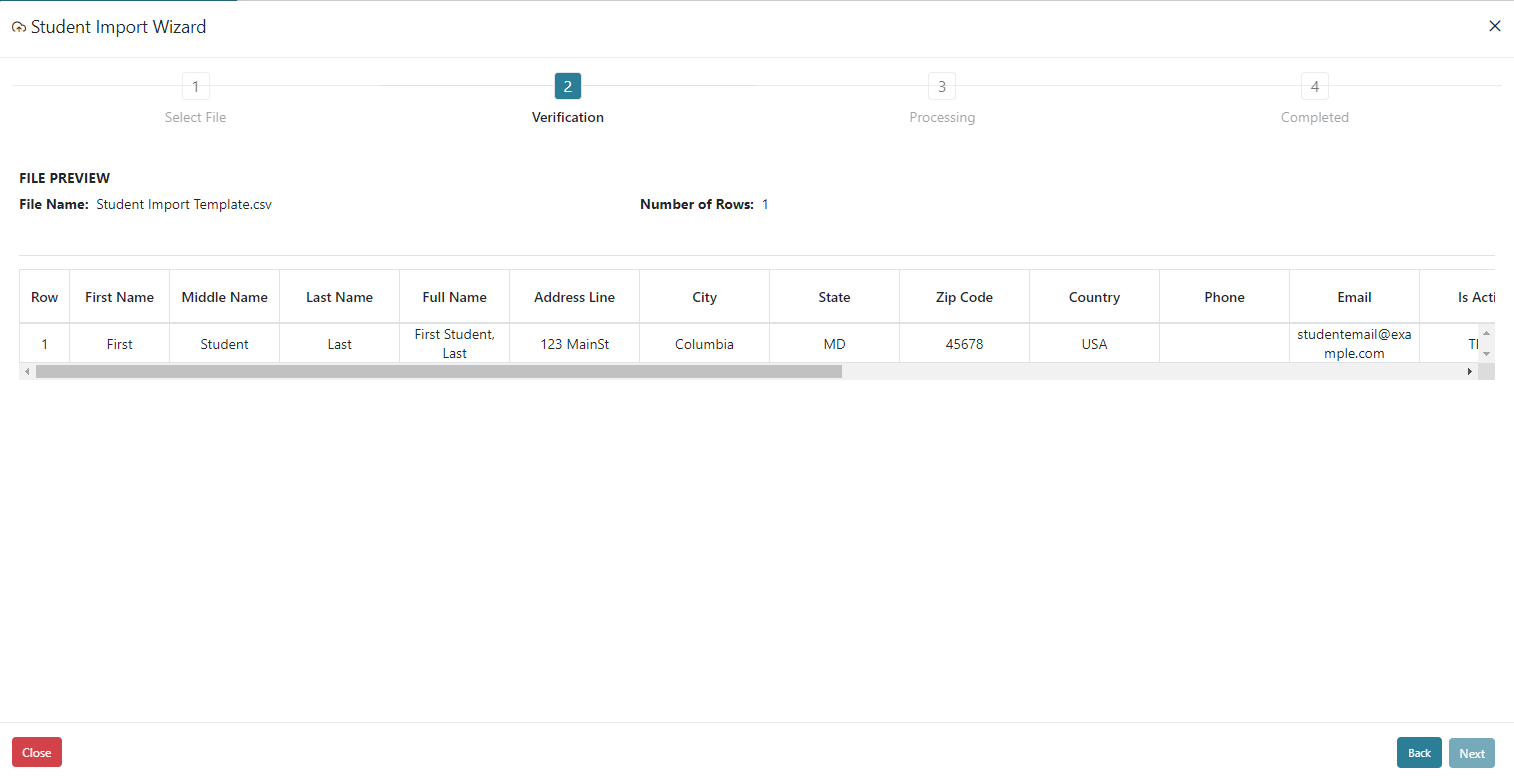
- Verification – On this step you can verify the data that will be imported. If you scroll to the right there is a message column that allows you do see if you have an error. Next will advance you to the next step of the import process.
- Processing – This step will execute the import of students very quickly.
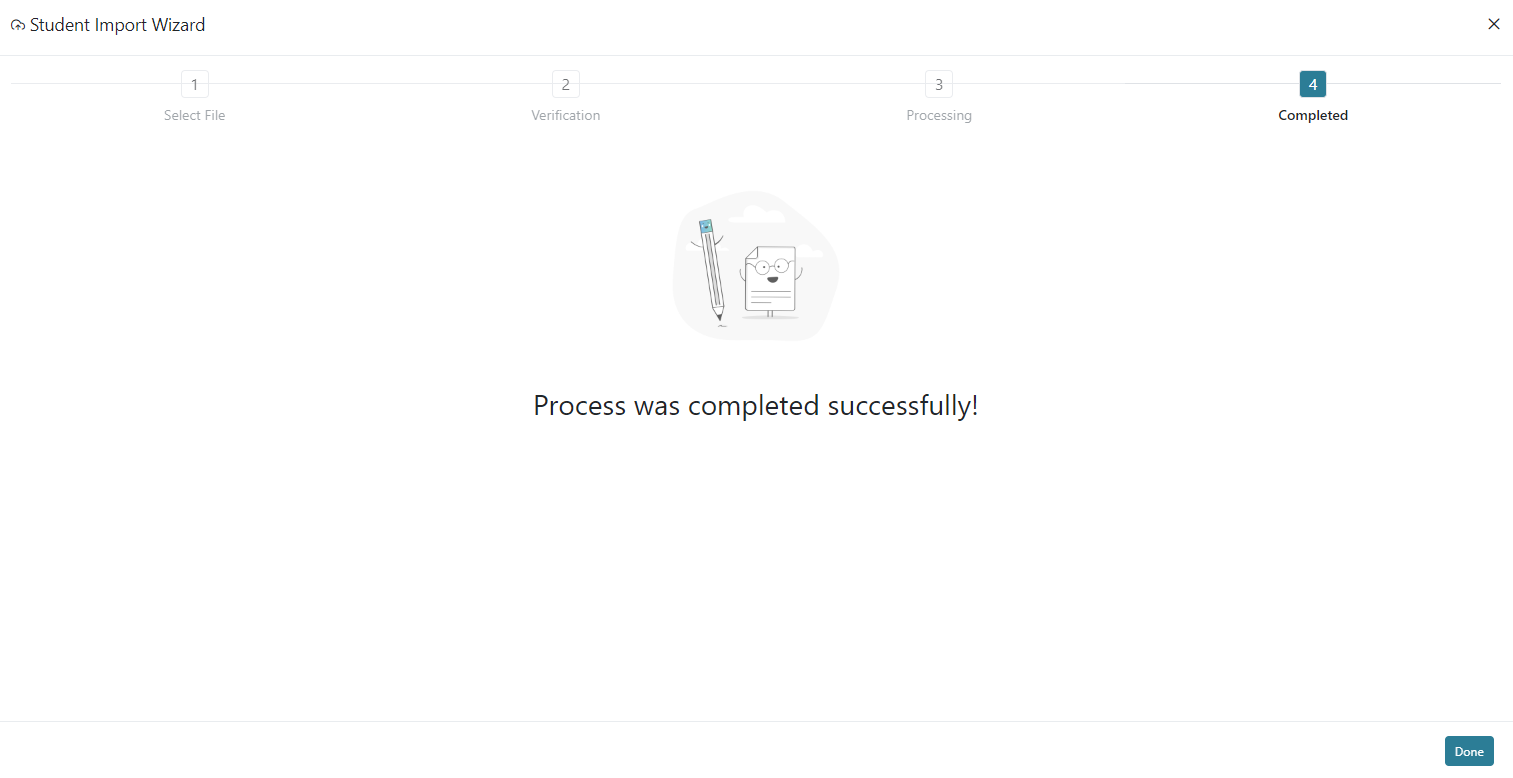
- Completed – On this step you will receive a success message once the import is completed. Done button on the bottom right will close the import wizard and return to the Student screen.
The action buttons in the Actions column allow you to Delete or View a Student.
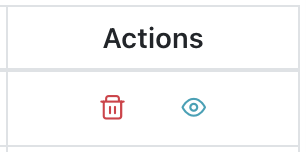
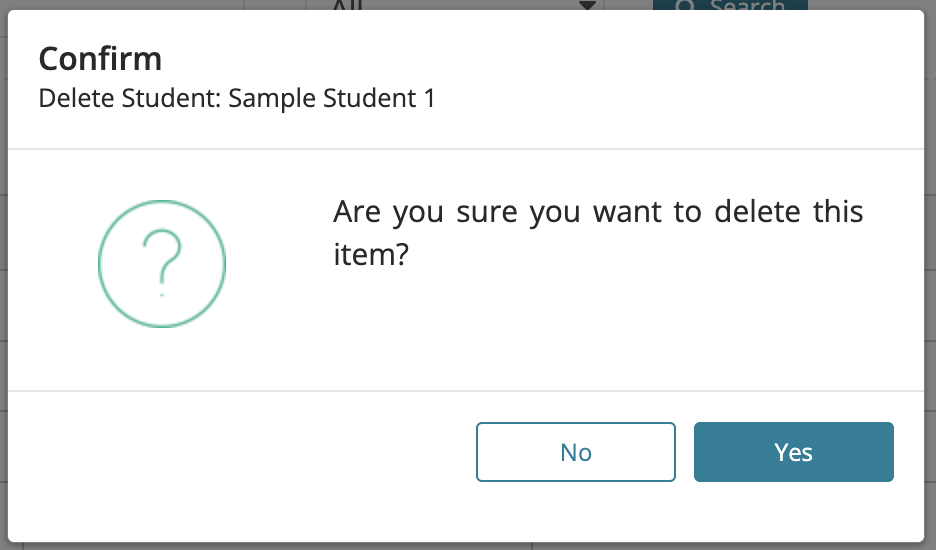
To Delete a Student, click on the Delete icon. The Student’s name will appear for confirmation on the top left of the screen, if you wish to Delete, click Yes. You will receive an error message if you are deleting a student that has activity or associated records.
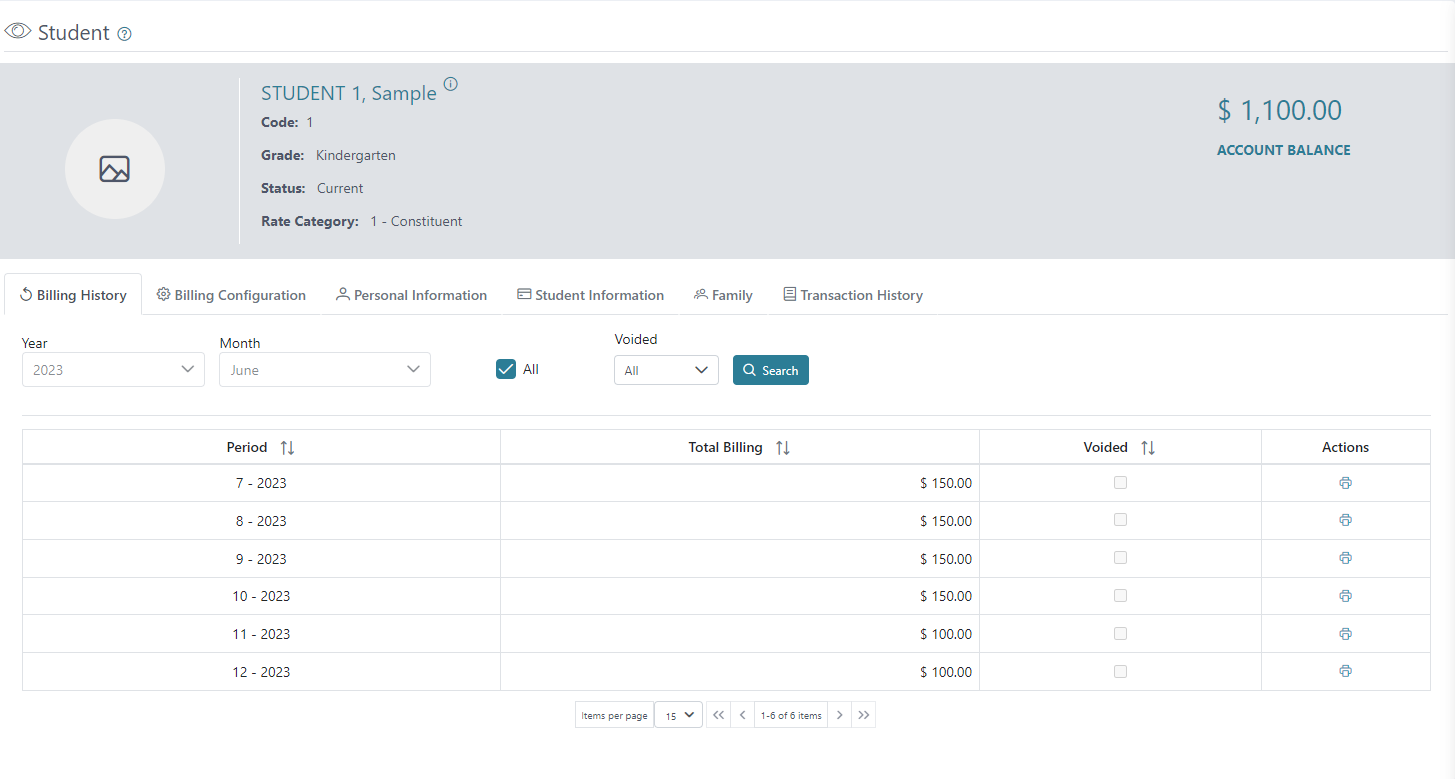
To View a Student, click on the View icon. In Student View you can view Billing History, Billing Configuration, Personal Information, Student Information, Family, and Transaction History of each student.