In Donation you can view and edit all envelopes that make up a Weekly Donation. Once you create a Weekly Donation, you can manually Add or Import Envelopes. You can also create a Deposit Slip and Close the Weekly Donation, both of which are required before completing Remittance for the corresponding month.
The grid view will display each Envelope Code, Donor Code, Donor Name, Amount, and Void status.

You can print or download a list of envelopes using the printer or Excel icons on the right, above the grid view.

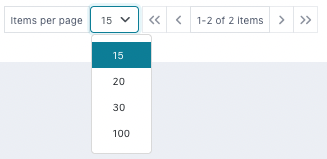
The grid view will display the first 15 Envelopes by default, and any additional Envelopes will be displayed in separate pages. There is a count for how many Envelopes are available and how many are being displayed on the page out of those available. The arrows can be used to move between pages.
You can search for Envelopes using Donor Name or Code.

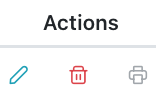
There are action buttons on the right for each Envelope to edit, delete, or print receipt. However, you may not edit or delete an Envelope in a Weekly Donation that has been closed. You also cannot print a donation receipt for an Envelope in a Weekly Donation that has not been closed.
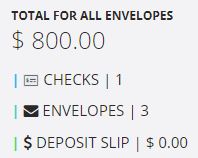
The summary in the top right displays the total donation amount in this Weekly Donation, the number of checks in this Weekly Donation, the number of Envelopes in this Weekly Donation, and the Deposit Slip total for this Weekly Donation.
The round action buttons in the top left allow you to Add Envelopes, Import Envelopes, create a Deposit Slip, or Close the Weekly Donation.
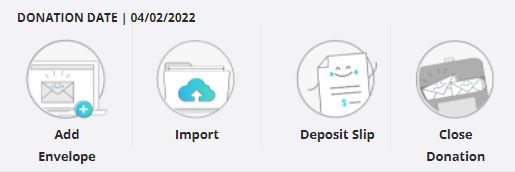
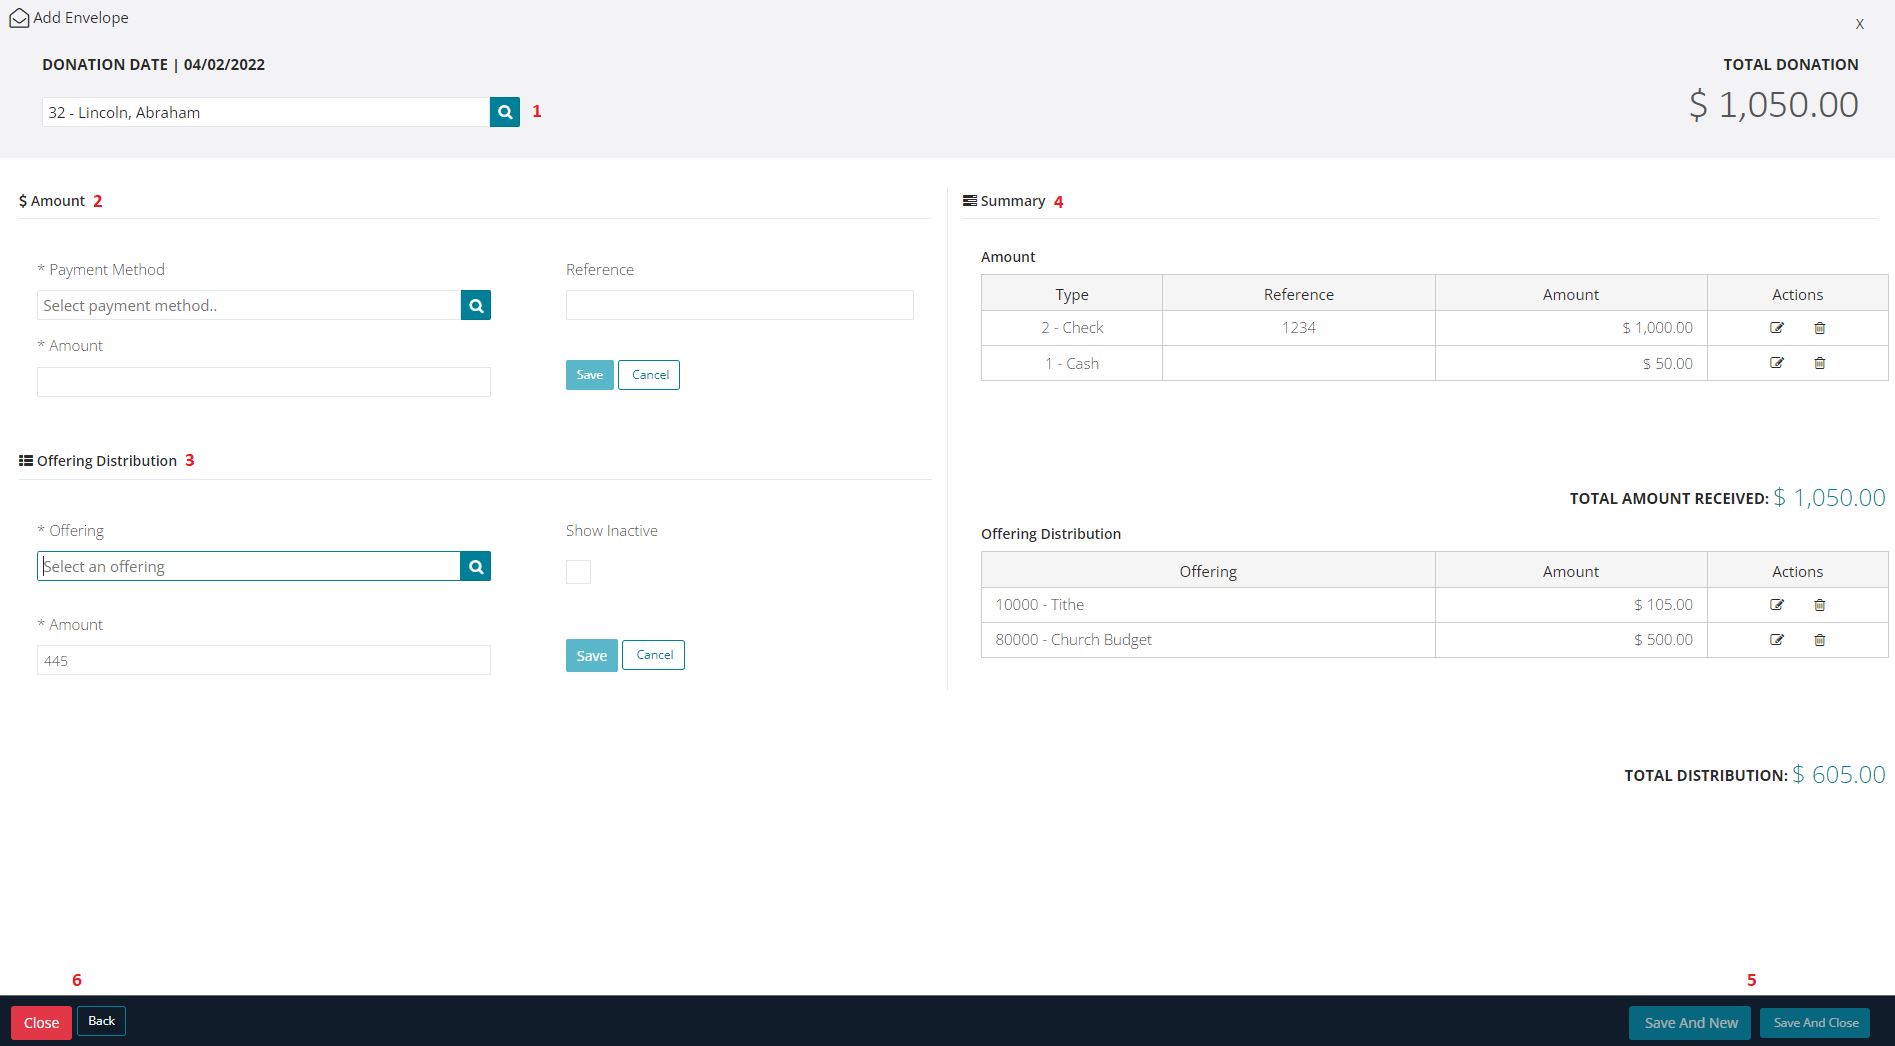
- Add Envelope – This is where you would enter Envelopes manually. This screen is designed to use the ENTER key to advance to the next available field so that you do not need to leave the keyboard. The selected field will have a green halo around it so the user can see where they are.
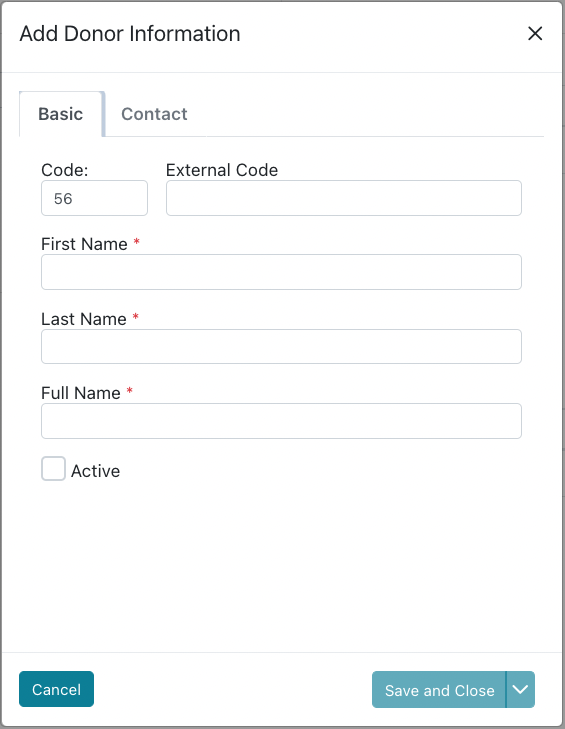
- You can search for existing Donors using Donor Name or Code. If a Donor does not exist, after pressing ENTER a popup will appear that will allow you to add a new Donor without leaving the Envelope.
- In the Amount section you will enter the Payment Method, Reference, and Amount that was received for each Envelope. The default Payment Method is configured in the Payment Method table (gear icon > Tables > Payment Method). When Cash is selected as the Payment Method, ENTER will advance you to the Amount field. When any other Payment Method is selected, ENTER will advance you to the Reference field. This saves you time since Cash likely doesn’t have a Reference number, but other Payment Methods do (e.g. check number).
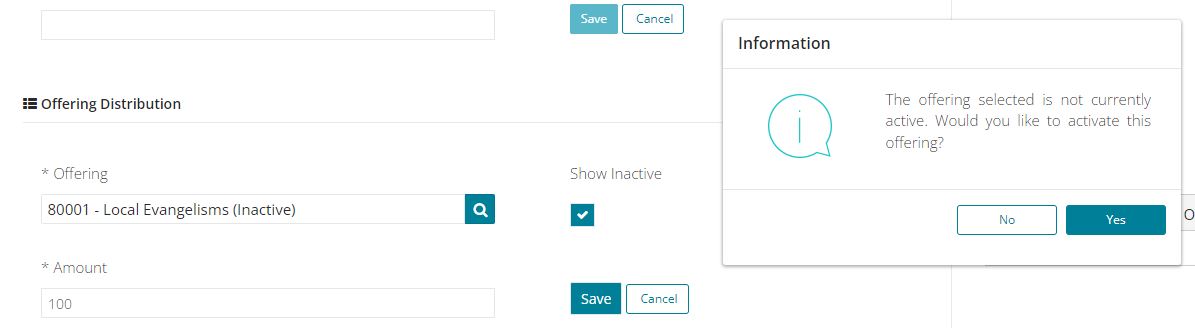
- In the Offering Distribution section you will enter the Offering Code and Amount that was received for each Envelope. You can search by Offering Code or Name, and you can use the Show Inactive checkbox to activate any inactive Offering Codes without leaving the Add Envelope screen. The Amount field in the Offering Distribution section will automatically update to the remaining balance to be distributed until it comes to zero.
- The Amount and Offering Distribution grids in the Summary section will automatically update with the values entered in the Amount and Offering Distribution sections, respectively, as they are saved (by clicking Save or using the ENTER key). The Actions in each grid can be used to edit or delete the corresponding line.
- The Save & New and Save & Close buttons will not be selectable until the Total Amount Received and the Total Distribution are in balance. Save & New will save the current Envelope and clear the screen so that a new Envelope can be entered. Save & Close will save the current Envelope and close the Add Envelope screen, taking you back to the Donation screen.
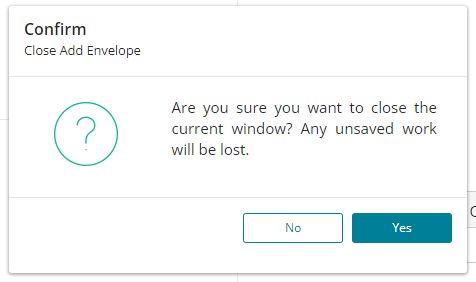
- Close will open a message confirming that you want to close the Add Envelope screen without saving. Next and Previous will move you between Envelopes within the selected Weekly Donation.
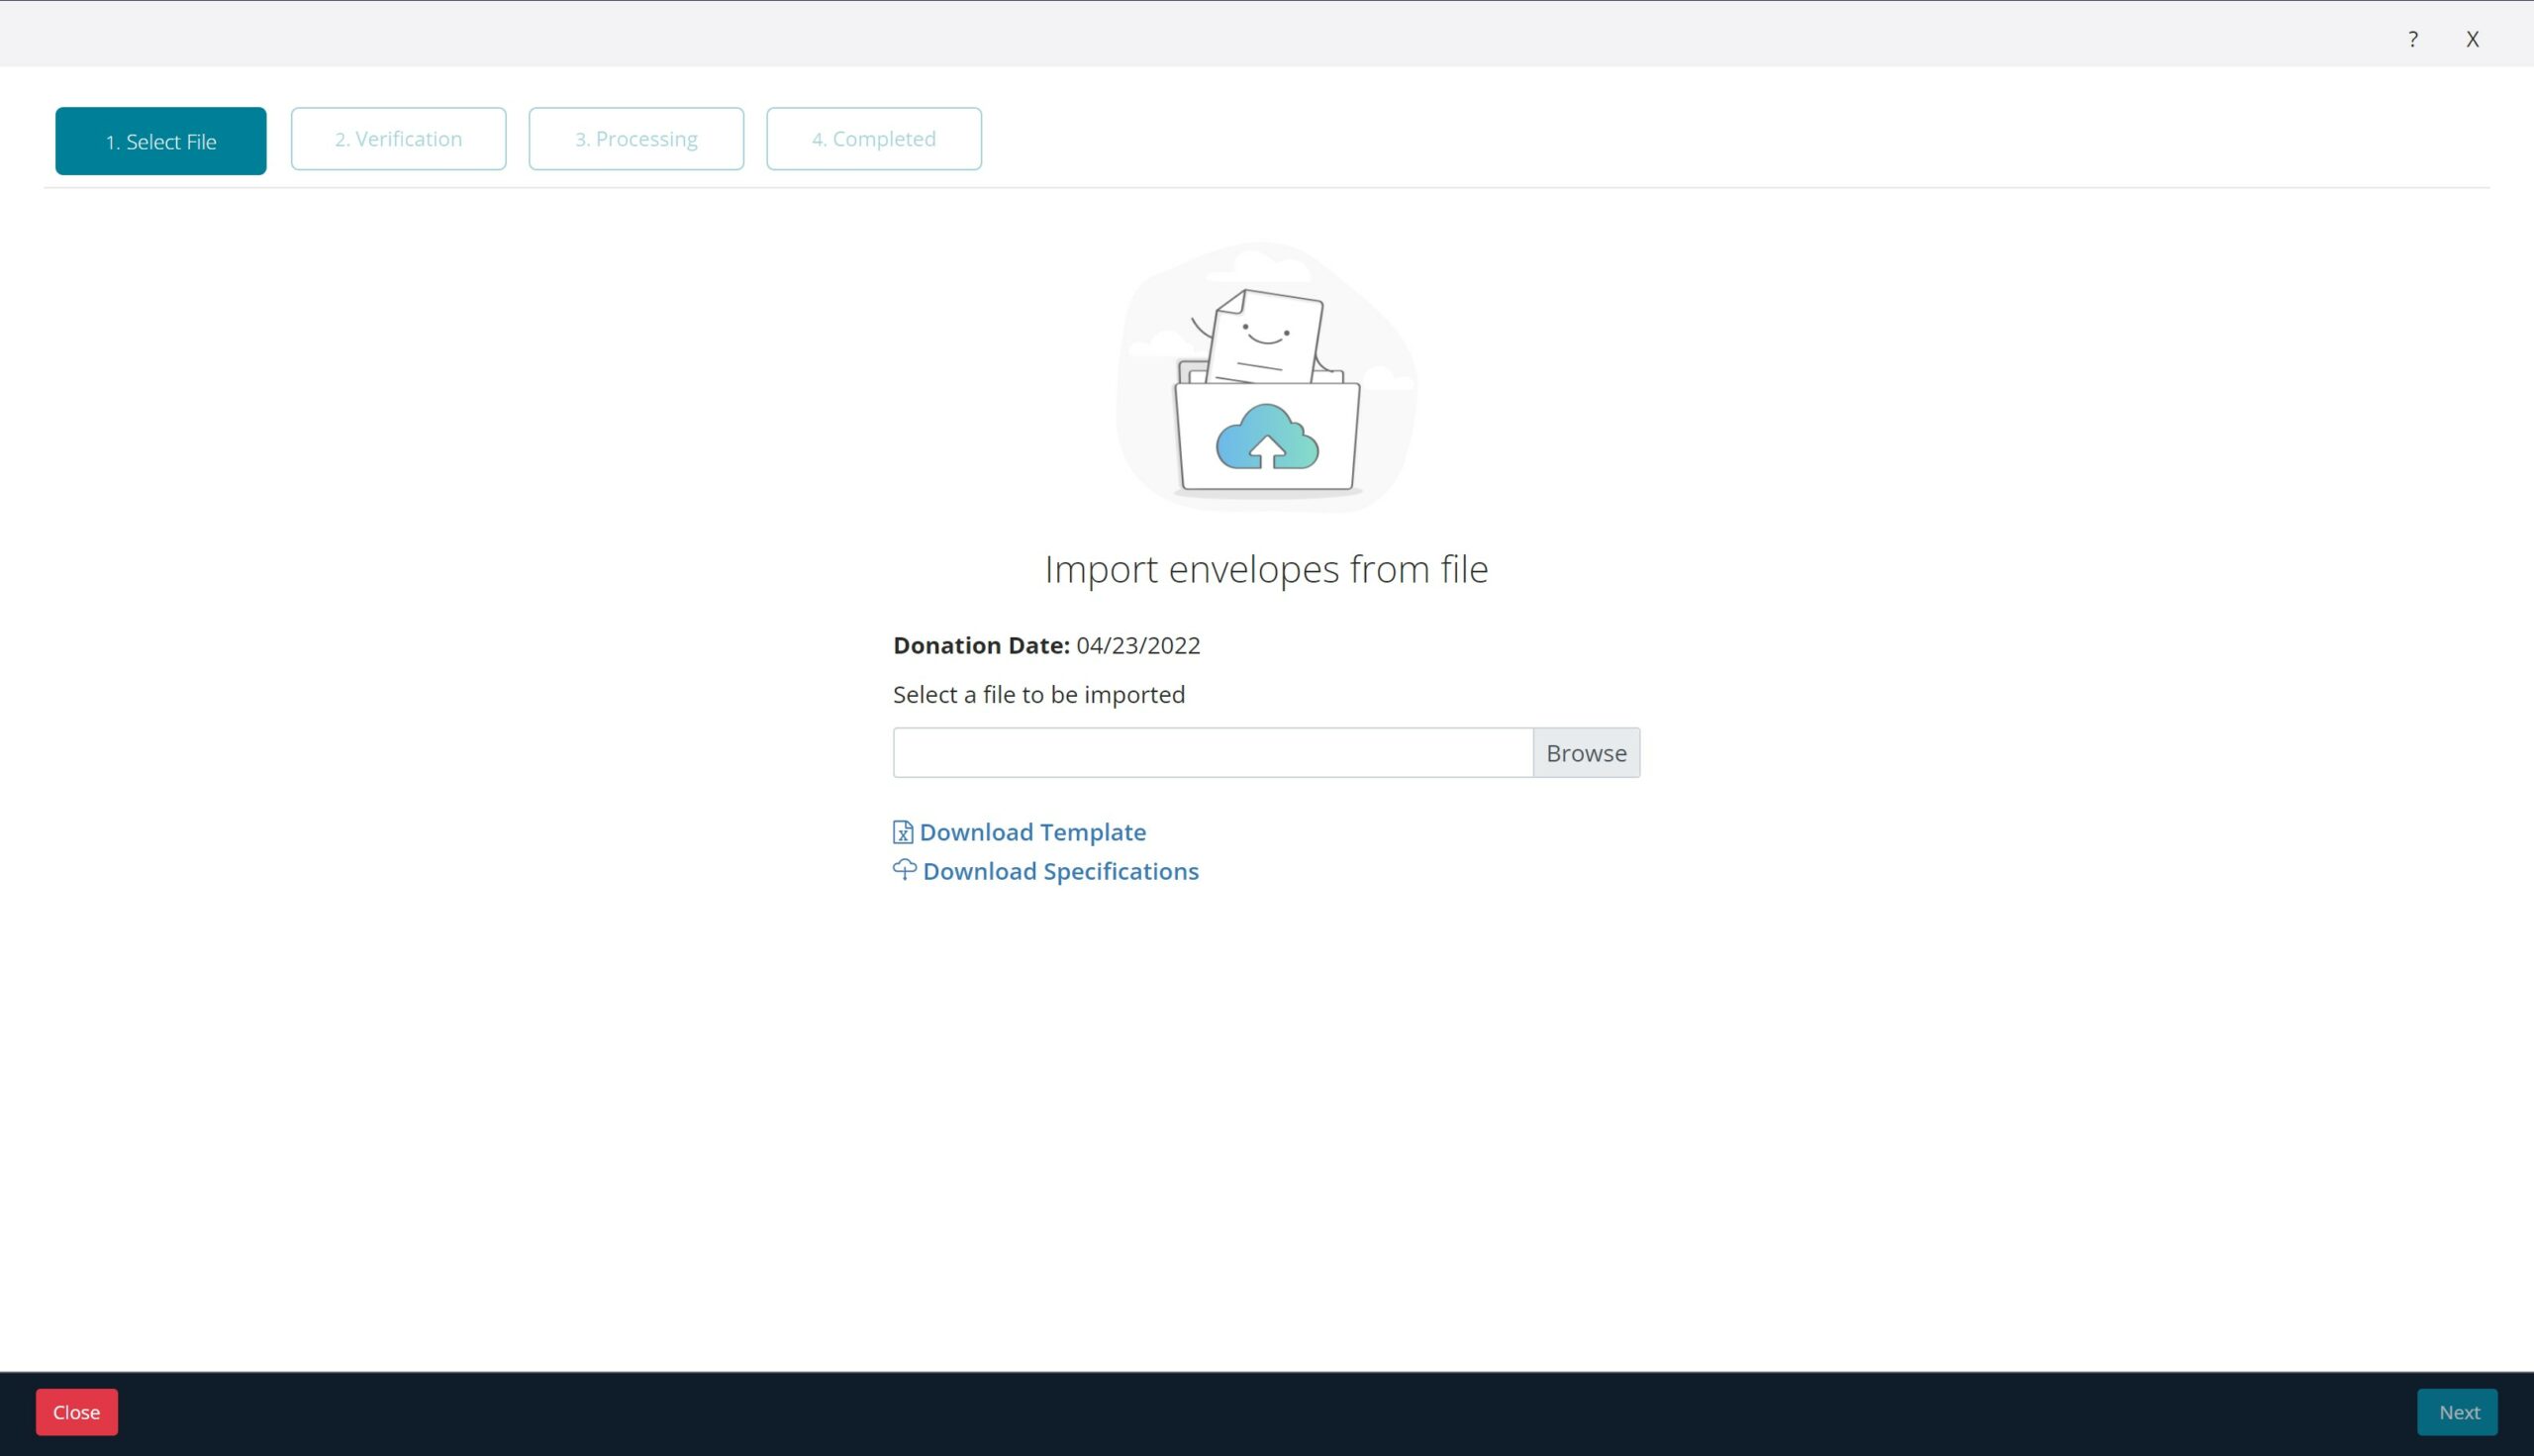
- Import – This is where you would import Envelopes from a CSV file. This would be useful if you are using an online donation platform that can export donation data to a file. Note that Adventist Giving batches can be downloaded from the prior screen, so there is no need to import those batches here. This process has four steps:
- Select File – On this step you can browse your computer for the CSV file to be imported. There are two blue hyperlinks where you can download a template CSV file with the correct headings prepared for import and specifications for formatting of an import file. Next will advance you to the next step of the import process and Cancel will cancel the process without saving any progress.

- Verification – On this step you can verify the data that will be imported. You can print or download a list of envelopes to be imported using the printer or Excel icons on the right, above the grid view. Next will advance you to the next step of the import process and Cancel will cancel the process without saving any progress.

- Processing – On this step you can see import errors. If there are no errors, you will automatically be advanced to the next step once this step is completed.
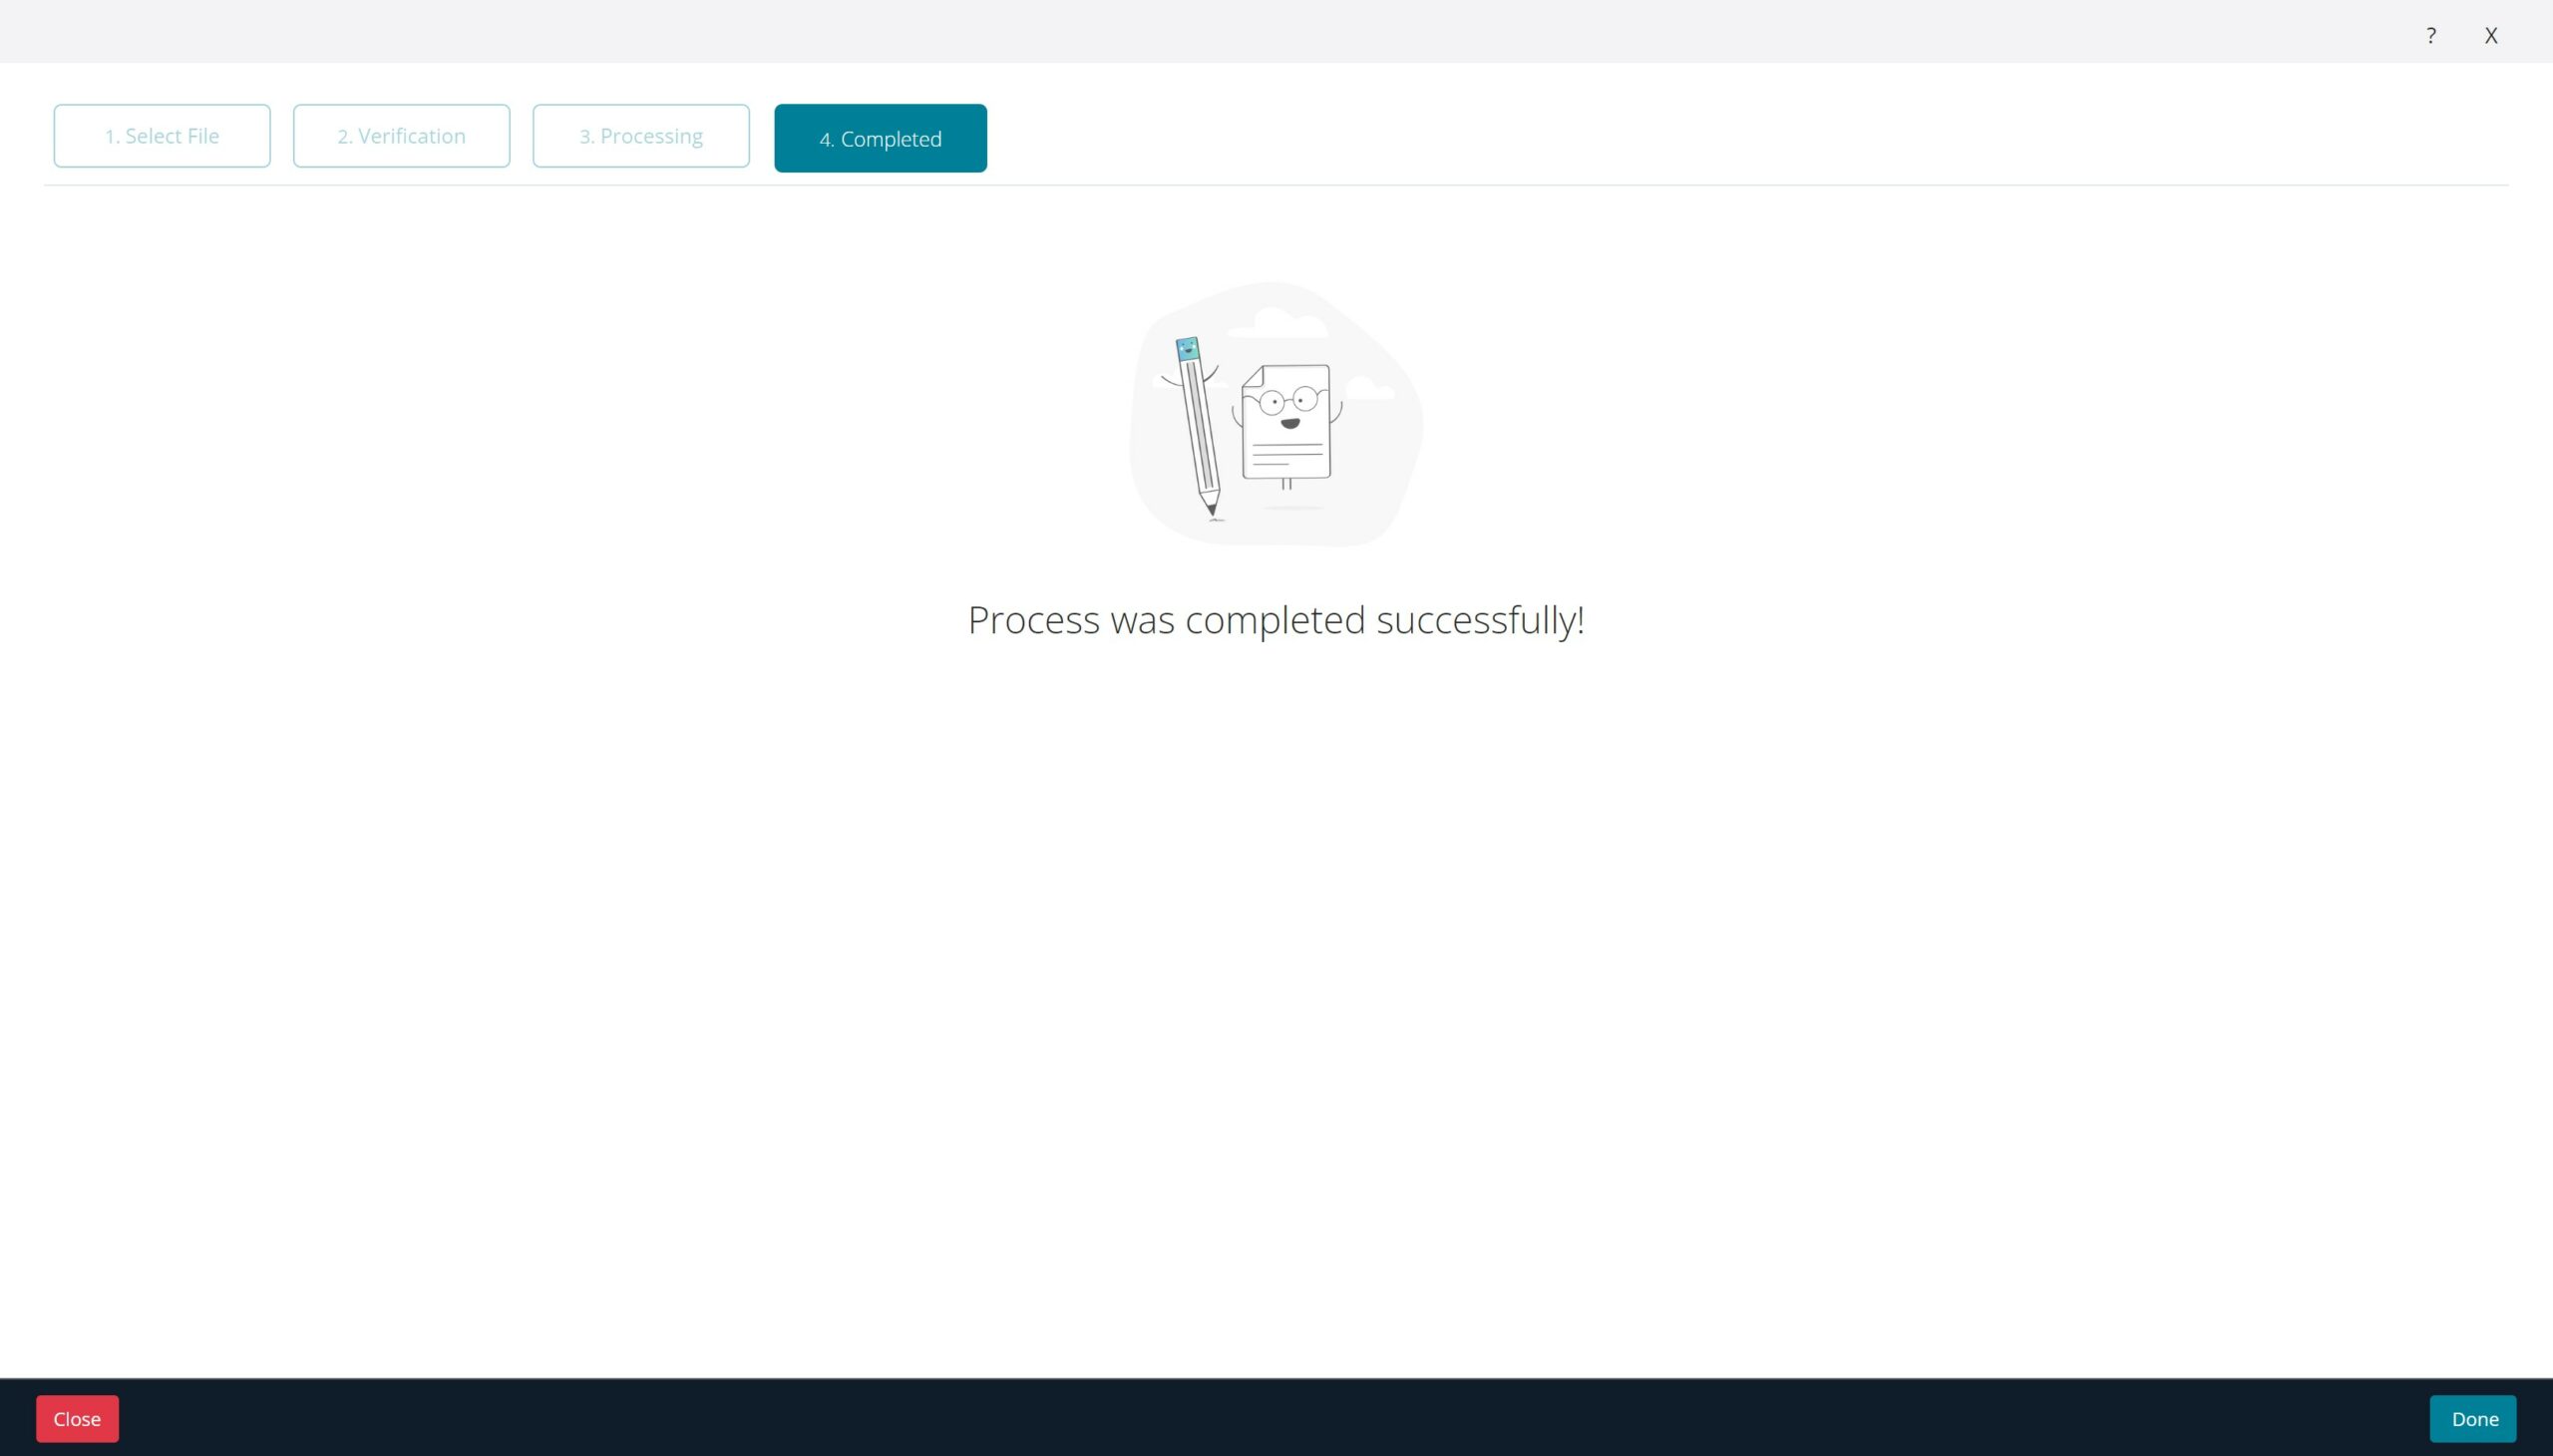
- Completed – On this step you will receive a success message once the import is complete. Done and Close will both close the Import popup and return you to the Donation screen.
- Select File – On this step you can browse your computer for the CSV file to be imported. There are two blue hyperlinks where you can download a template CSV file with the correct headings prepared for import and specifications for formatting of an import file. Next will advance you to the next step of the import process and Cancel will cancel the process without saving any progress.
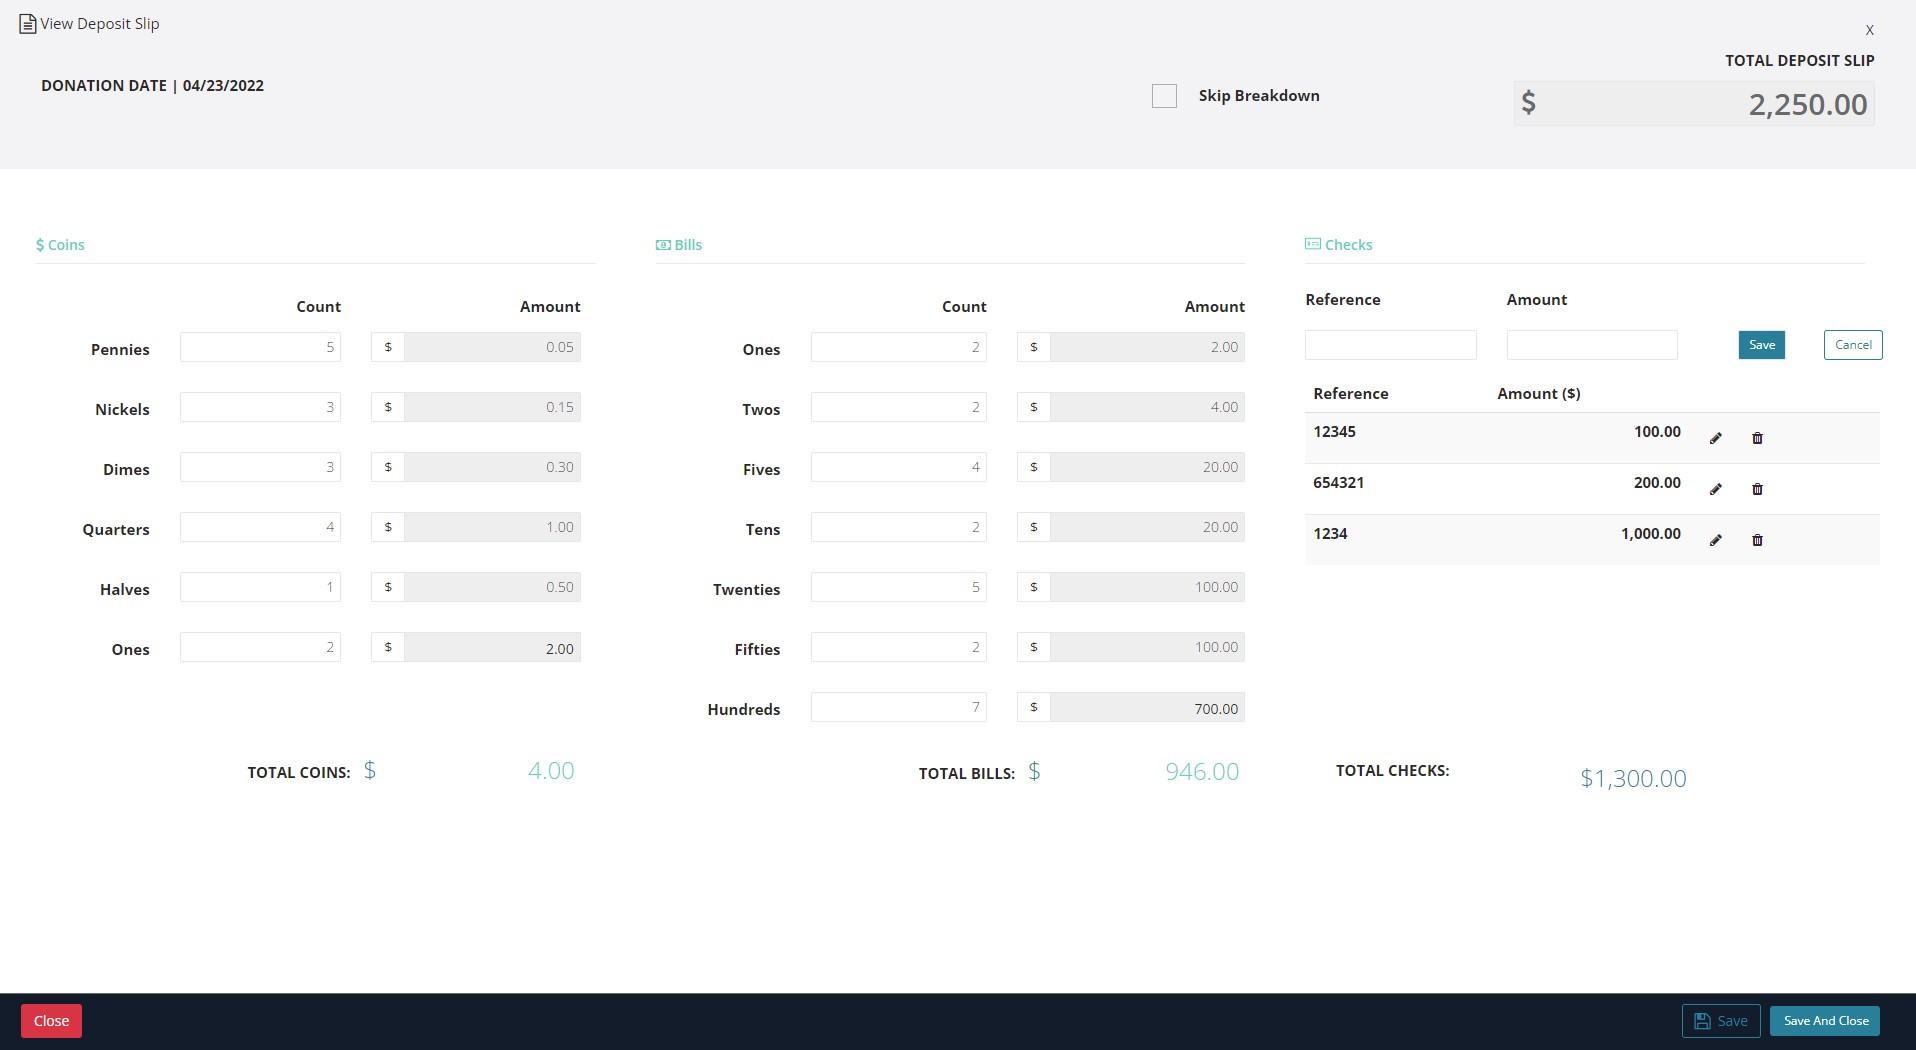
- Deposit Slip – This is where you would enter the data for the deposit to the bank for the selected Weekly Donation. Ideally, this would be an independent count of all cash and checks in this Weekly Donation so that it can be checked against the Envelope total. Note that the Envelope total does not appear on the Deposit Slip screen so that this count can be done independently without the user attempting to fit the breakdown to the total. The Deposit Slip can be created before or after the Envelopes in the Weekly Donation, but the Weekly Donation cannot be closed until both are completed and the Envelope total matches the Deposit total.
- Skip Breakdown – You can use this option to enter a single Deposit Slip total value that must balance with the Envelope total for this Weekly Donation. This might be used if there is no cash in the Weekly Donation and a minimal number of checks, or if the entire Weekly Donation consists of electronic deposits. When this checkbox is selected, users are not required to enter any other information on the screen other than a Total Deposit Slip value.
- Coins – This is where a count of all coins in the Weekly Donation can be entered.
- Bills – This is where a count of all bills in the Weekly Donation can be entered.
- Checks – This is where a breakdown of all checks in the Weekly Donation can be entered. Note that all checks can be entered as a single entry, and Reference is not a required field. The pencil and trash can icons can be used to edit and delete each check, respectively, after it is created.
- Save will save the values on the screen without closing the Deposit Slip popup. Save & Close will save the values on the screen and close the Deposit Slip popup. Close will close the Deposit Slip popup without saving any of the values on the screen.
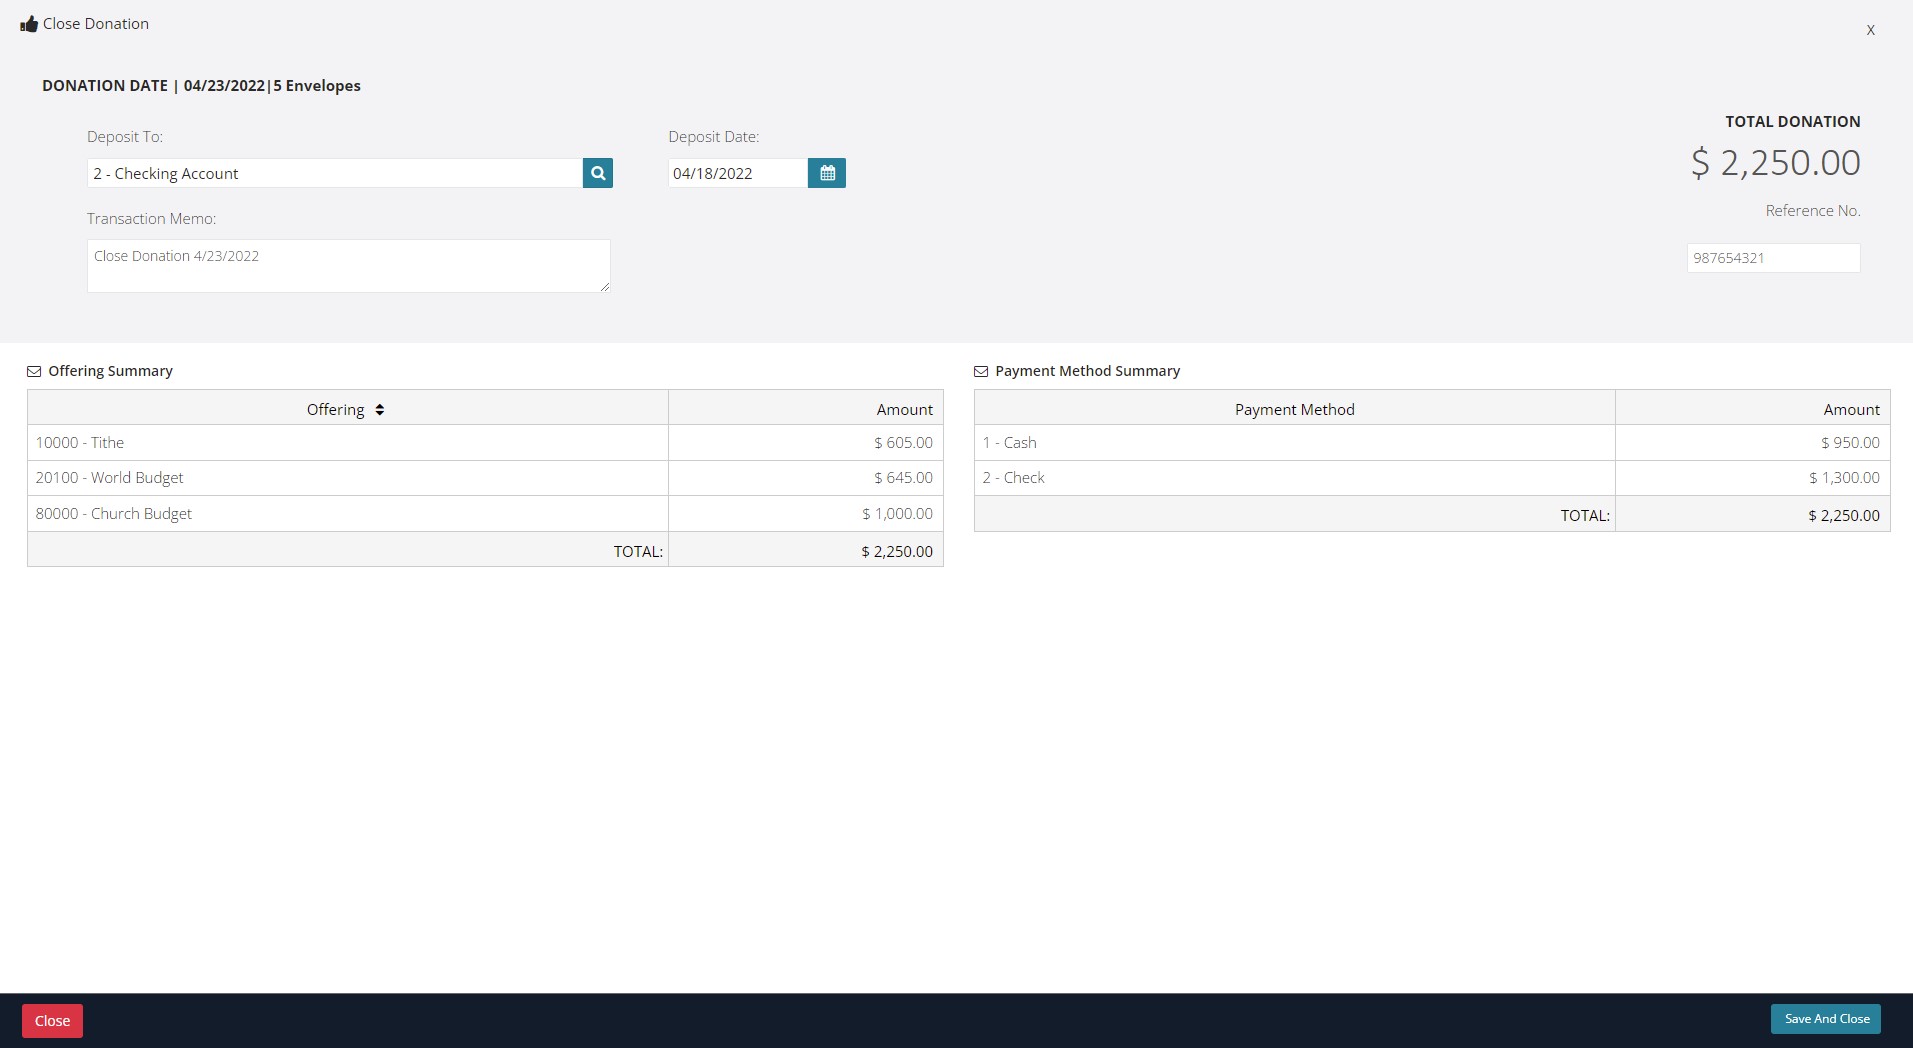
- Close Donation – Once all Envelopes have been entered manually or imported, and the Deposit Slip has been created, assuming that the Deposit Slip and Envelope totals are in balance, a message will appear that this donation is ready for closing and processing. You can select the Close Donation button or the hyperlink in that message to begin the Close Donation process. The Close Donation popup will open with the Offering Summary on the left and the Payment Method Summary on the right. The default Deposit To account is configured in the Deposit field in the Bank Account section of the Organization Settings screen (house icon > Settings). You can select from any bank accounts configured in the Bank Accounts table (gear icon > Bank Accounts). The default Deposit Date is the current date, but this can be modified to any date prior to the current date. A generic Transaction Memo is populated automatically, but this can also be modified. There is no default value in the Reference No. field, but this field can be populated with something like a deposit slip number from a physical deposit slip book. This is not a required field. Save & Close will close the Weekly Donation. Close will close the Close Donation popup without closing the Weekly Donation. Once a Weekly Donation has been closed, changes to Envelopes in that Weekly Donation can only be made via the Search Envelopes screen (this will result in the original transaction being voided). Closed Weekly Donations cannot be reopened.